Saved Views & Scheduled Reports

Filter your freight and request scheduled reports via your Shipments Tab. This article covers how to use custom filters to create Saved Views, which can be utilized to request scheduled reports.
Saved Views
Clicking on a Saved View is the first step to set up Scheduled Reporting.
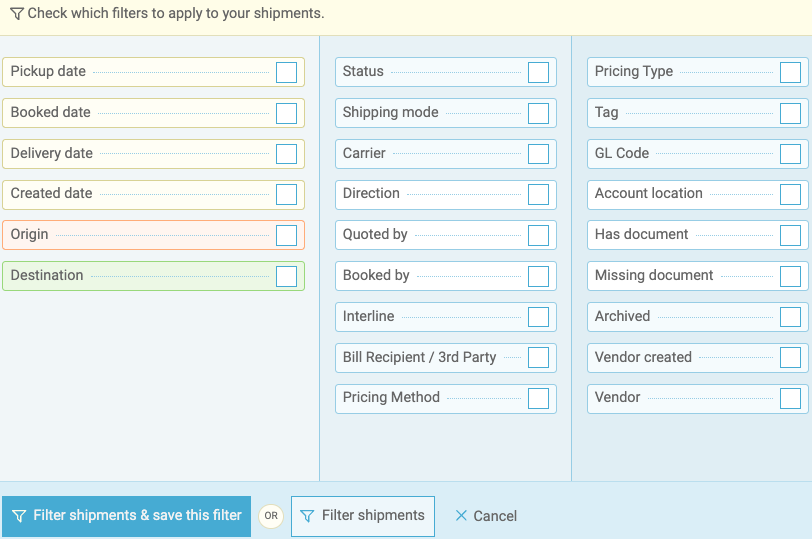
To create a new view, scroll down the left column of the Shipments page to Create a custom filter. Once you have selected the criteria you want, click Filter & Save for future use.
Saved views are then added to your filters column and can be clicked during future sessions. To learn more about functionality within your Shipment page, click Here.
Scheduled Reports
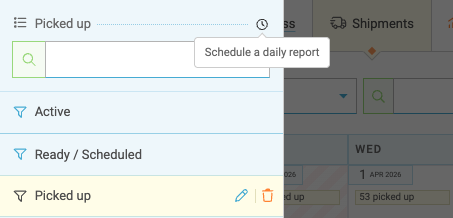
This feature automatically sends a CSV file of shipment data to any inbox, during a time frame & frequency of your choosing. First, make sure you have a Saved View of the data you'd like to receive. (For example: Ready/scheduled Status).
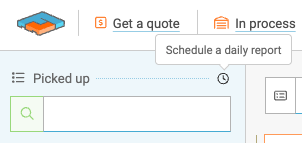
Next, click the clock icon to open the Scheduled Report slider.
A menu appears with the following options:
- How often do you want to receive the report?
- Which email recipients should we include?
- Should we send a Basic or Advanced version of the report?
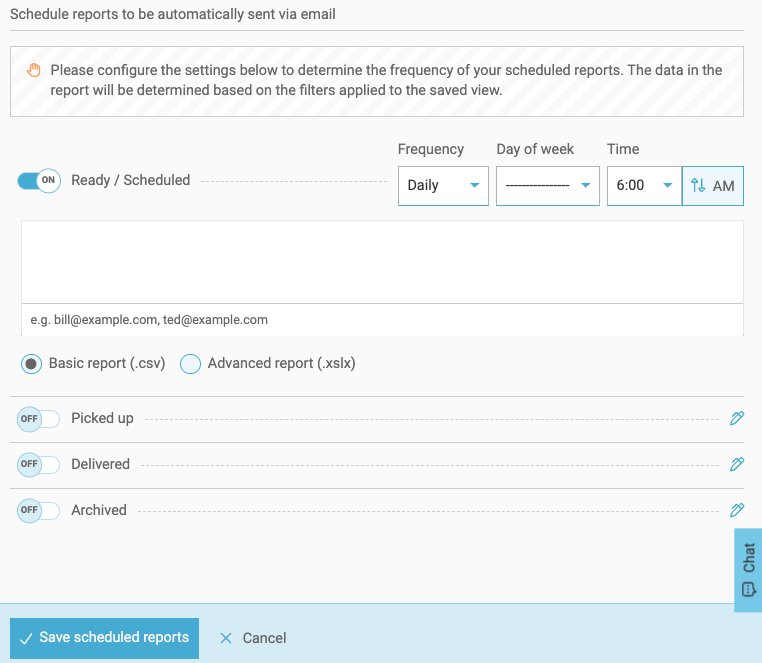
Hit √ Save scheduled reports, and you are finished.
You can create as many views/reports as needed. This highly requested feature can also be shared with members of your organization outside of Freightview, giving you another way to own your data and save time and money!
Using the condensed or calendar view?
Click Edit filters for the clock icon to appear - and proceed accordingly. More on our Calendar view.


Shipping with Freightview just got smarter. As always, if you have questions, feedback, or ideas for future enhancements, our Support Team would love to hear from you!