GL Codes & Tag Management
Keeping shipments organized is essential when it comes to reporting, billing, and trend analysis. With GL Codes and Tags, Freightview gives you flexible tools to label, filter, and report on shipments in ways that actually match how your business operates.
Here’s how each works—and when to use them.
GL Codes: Structured Tracking for Accounting & Billing
GL Codes allow you to assign a specific accounting code to a shipment, making it easier to separate freight activity by business unit, location, or billing responsibility.
This is especially useful when shipments need to be:
Billed to different company branches or facilities.
Reported separately for accounting or auditing.
Filtered for invoicing and bill-pay workflows.
How to Set Up GL Codes
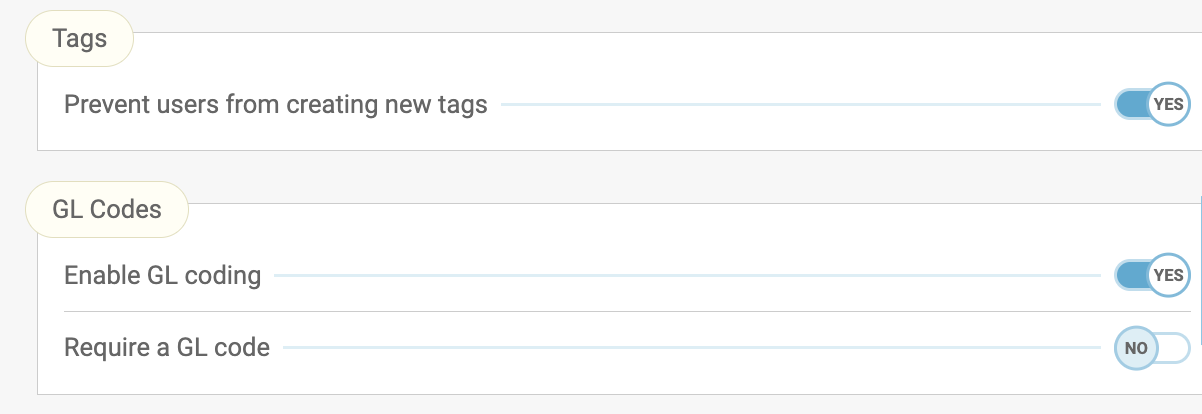
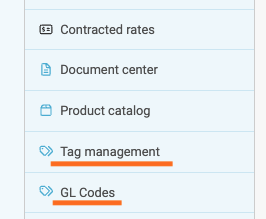
If you have Tags permission enabled, you’ll see a GL Code option in your Freightview Settings.
First, create a short GL Code, such as “KC”, and add a description, such as “Shipments Billed to Kansas City Facility”. GL Codes can be added to a load at the time of booking or afterwards on the shipment details page.

Tracking GL Codes
The codes are accessible for reporting in two main locations within the app: the Shipments or Analytics page.
Create a custom filter to view the data, or go a step further to request a CSV copy.
These can also be found in Audit Exports (under the Accepted queue).
Now your teams have a clean, consistent way to slice shipment data.

Tags: Flexible Labels for Tracking Trends & Exceptions
Tags are free-form labels you can apply to shipments to capture context that doesn’t belong in a rate or reference field.
Common Uses for Tags
Tags are ideal for tracking things like:
Cargo claims.
Rate discrepancies.
Reason codes.
Exceptions or internal notes.
Any trend you want to report on later.
**Unlike GL Codes, tags are intentionally flexible—use them however your team needs.
Managing Tags
Account admins manage tag access through Settings. Tags are account-specific, so only labels created under your account will appear in filters and reports. Simple, fast, and no rigid rules.
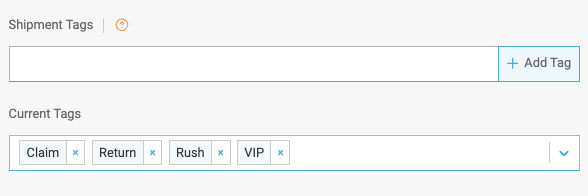
How to Tag a Shipment
Start typing in the tag field during booking or on the shipment
Press Enter to add the tag
Previously used tags will auto-suggest as you type
Add multiple tags if needed
Remove a tag by clicking the “x”
Finding & Reporting on Tagged Shipments
To locate tagged shipments: Go to the Shipments page, create a Custom Filter from the bottom-left, and select Tag to view your account’s available options
Here you can also Save the filtered view for future use or export the list to a CSV for delivery to any Inbox.
GL Codes vs. Tags: When to Use What
Use GL Codes when shipments need structured, repeatable categorization—especially for accounting or billing.
Use Tags when you need flexible labels to track trends, issues, or one-off details.
Most teams use both together for maximum visibility - check with your account Admins to decide what works best for you.
We hope these tools help your team ship smarter, report faster, and spend less time digging through spreadsheets. Questions or ideas? Our Support Team is always happy to help.