Connecting to Freightview's API with Postman
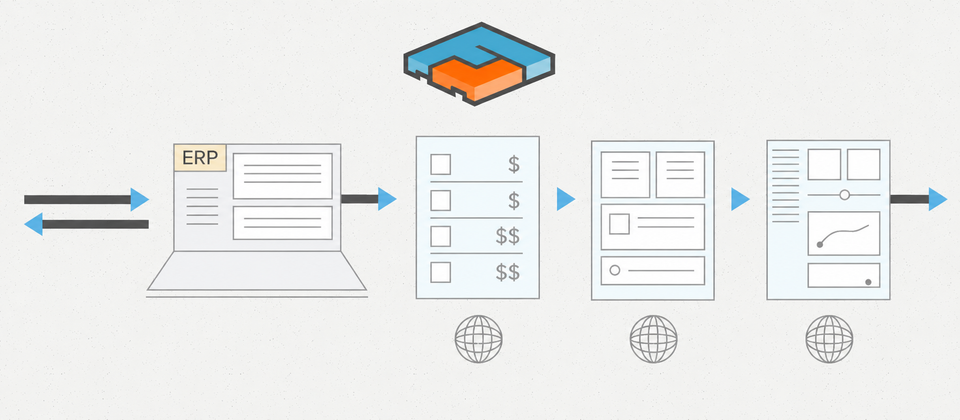
Want to connect Freightview to your existing software? With Freightview’s API, customers can access quotes, book shipments, and track freight directly from their own systems—including ERPs, e-commerce platforms, shopping carts, and custom-built tools.
If you’re not a developer, don’t worry. Postman makes it easy to test API requests visually without writing a line of code. In this guide, we’ll walk through how to authenticate with Freightview’s API and make your first API request using Postman.
About Freightview’s API
Freightview’s API is RESTful and uses standard JSON payloads, making it straightforward to integrate with most modern applications and development environments.
Our Developer Documentation provides detailed information about available endpoints, request parameters, response formats, and more.
For this guide, we’ll focus on the basics:
- Obtaining your Freightview API credentials
- Generating an access token
- Authenticating API requests
- Testing an API request in Postman
- Getting started with Freightview webhooks
Getting Started: API Authentication
Freightview’s v2 API uses the OAuth 2.0 Client Credentials authentication workflow.
The process is simple:
- Generate your
client_idandclient_secretin Freightview. - Send those credentials to the
/v2.0/auth/tokenendpoint. - Receive a Bearer access token that is valid for 24 hours.
- Include that Bearer token with your subsequent API requests.
If authentication is missing or invalid, the API will return a 401 Unauthorized response.
Keep your credentials secure: Your client_secret should never be exposed in client-side applications, public repositories, or shared with unauthorized users.Step 1: Obtain Your API Credentials
Before you can make API requests, you’ll need your Freightview v2 API credentials.
- Log in to Freightview.
- Go to Settings using the gear icon (next to your username in the upper right corner of the screen).
- Scroll down through the Settings tabs and select API Integration.
- Make sure the API Credentials for v2 tab is selected.
- Select + Create API Credentials.
- Enter a name for the API credentials (this can be used to help you remember where you're using these API credentials). Select Submit.
- Copy the Client ID and Client secret values, and store them as
client_idandclient_secret.
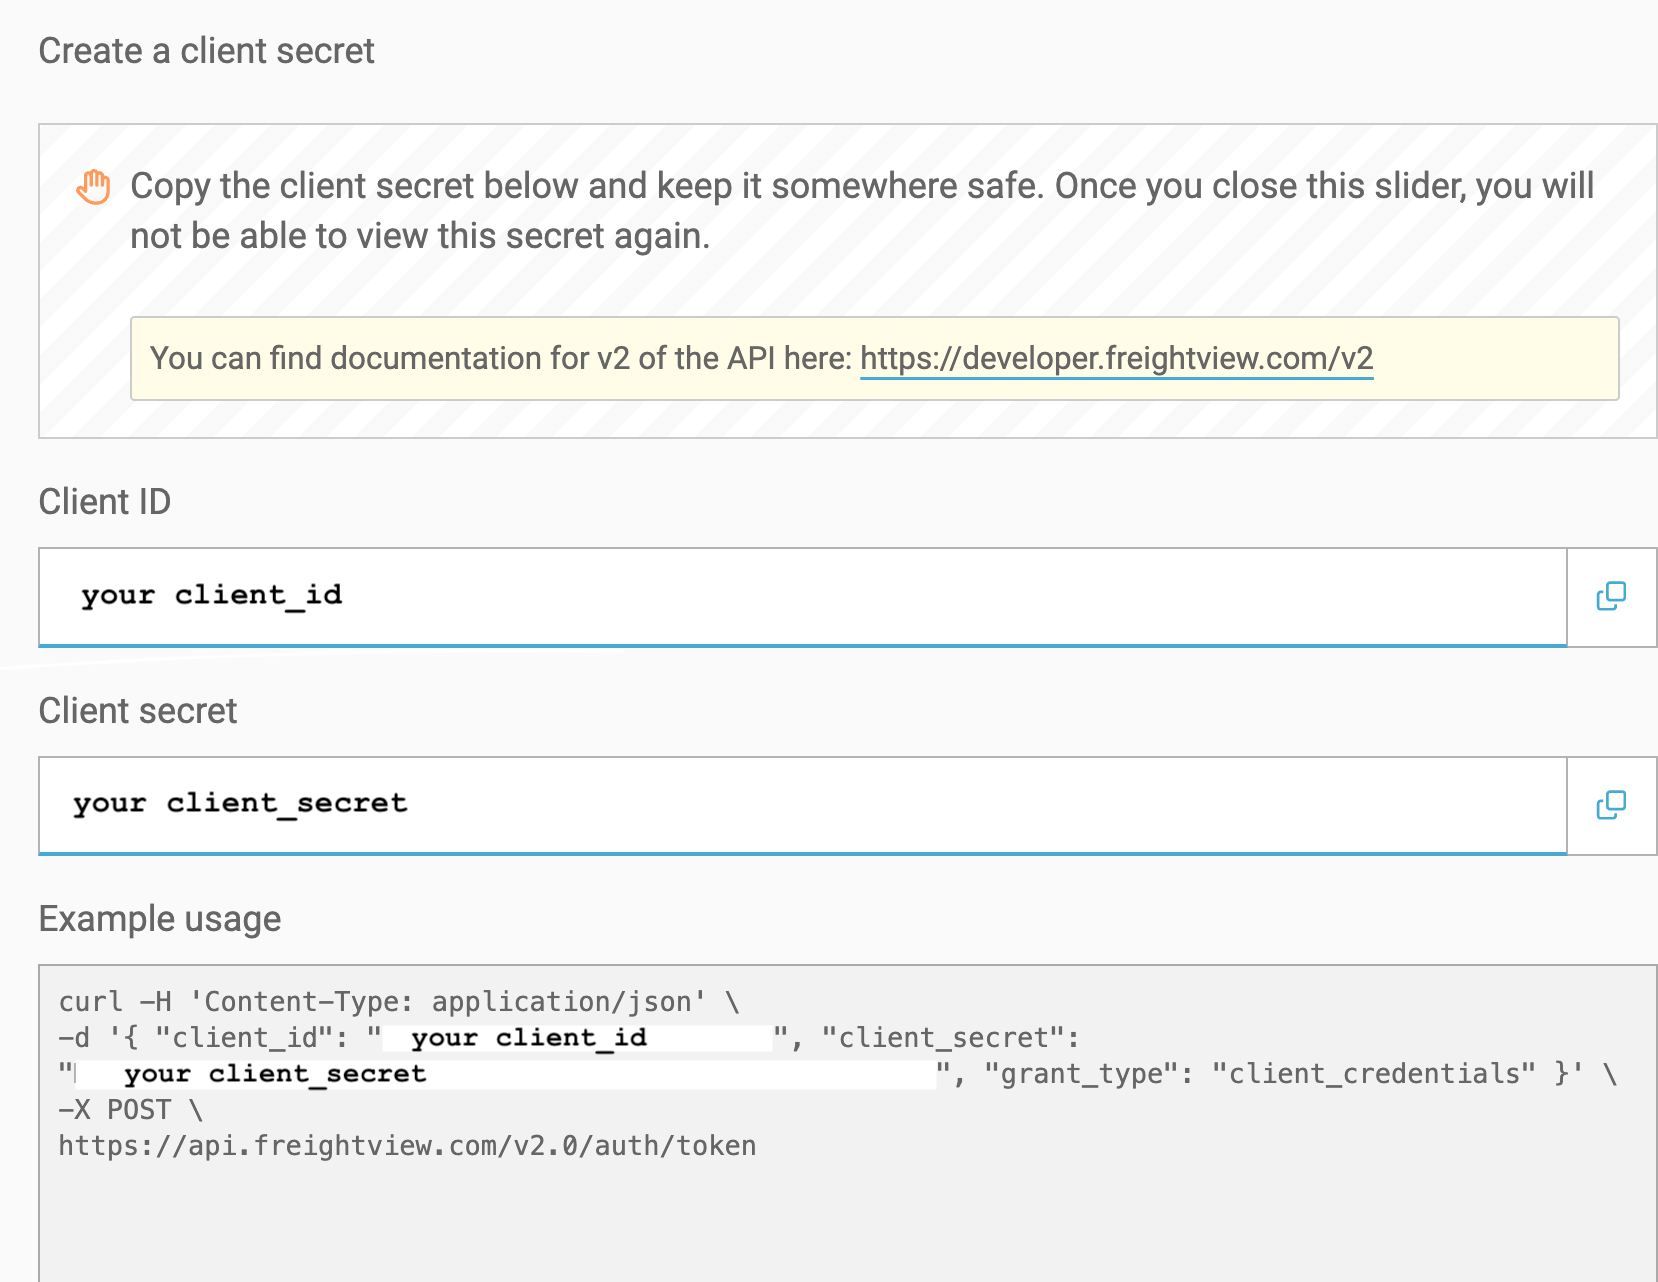
Important: Treat your client_secret like a password. Store it securely and don't include it in screenshots, documentation, or publicly accessible code.
Step 2: Generate an Access Token
Once you have your credentials, you’ll use them to request an access token from Freightview.
The authentication endpoint is:
POST https://api.freightview.com/v2.0/auth/token
The request requires three pieces of information:
{
  "client_id": "YOUR_CLIENT_ID",
  "client_secret": "YOUR_CLIENT_SECRET",
  "grant_type": "client_credentials"
}
Optional: Test with cURL
If you’re comfortable using a terminal, you can quickly test your credentials with cURL:
curl -X POST https://api.freightview.com/v2.0/auth/token \
  -H "Content-Type: application/json" \
  -d '{
    "client_id": "YOUR_CLIENT_ID",
    "client_secret": "YOUR_CLIENT_SECRET",
    "grant_type": "client_credentials"
  }'
A successful request will return a JSON response containing your access_token.
Step 3: Generate an Access Token in Postman
If you prefer a visual interface, Postman is a popular tool for testing APIs.
Create the authentication request
- Open Postman and create a new request.
- Set the HTTP method to POST.
- Enter the following URL:
https://api.freightview.com/v2.0/auth/token - Open the Headers tab and make sure the following header is included:Content-Type:
application/json - Open the Body tab.
- Select raw and choose JSON from the format dropdown.
- Paste in the following request body, replacing the placeholder values for
client_idandclient_secretwith your API credentials:
{
  "client_id": "YOUR_CLIENT_ID",
  "client_secret": "YOUR_CLIENT_SECRET",
  "grant_type": "client_credentials"
}- Click Send.
A successful request will return a 200 OK response containing your access_token.
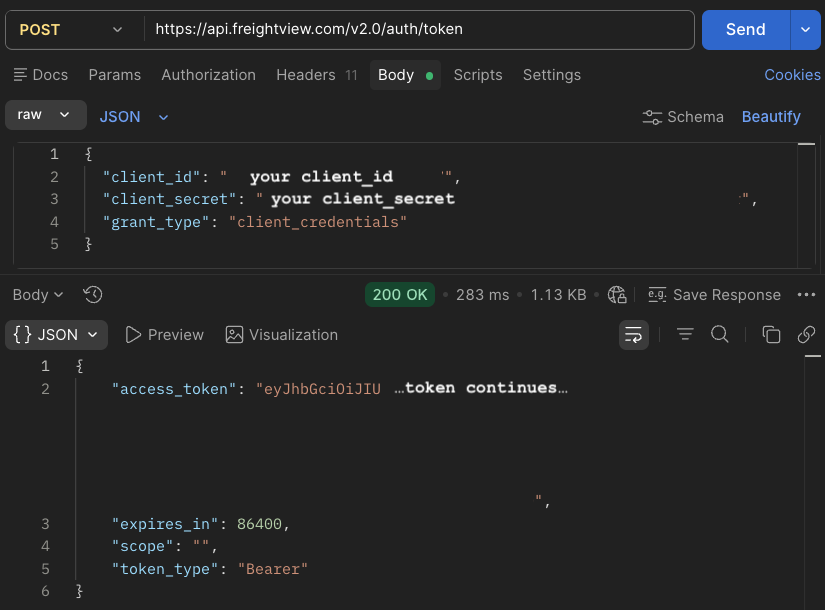
Keep your token handy
Your access token is valid for 24 hours.
The /v2.0/auth/token endpoint is also limited to 5 requests per minute, so applications must cache and re-use the access token rather than requesting a new token with every API call.
Step 4: Make an Authenticated API Request
Now that you have an access token, you can use it to authenticate requests to Freightview’s v2 API.
For this example, we'll use the LTL shipment endpoint.
Set up your request
- Open a new request in Postman.
- Set the HTTP method to POST.
- Enter:
https://api.freightview.com/v2.0/shipments/ltl - Open the Authorization tab.
- Set Auth Type to Bearer Token.
- Paste your
access_tokeninto the Token field.
Postman will automatically add the appropriate authorization header to your request.
Alternatively, you can add the header manually under the Headers tab:
Authorization: Bearer YOUR_ACCESS_TOKEN
- Under Headers, make sure the following is included:Accept:
application/json - Open the Body tab.
- Select raw → JSON.
- Enter the request payload required for the endpoint you're using. You can find the required fields and examples in the Freightview Developer Documentation.
- Click Send.
A successful request will return a 200 OK response along with the appropriate shipment, quotes, and other API response data.
What's Next?
Once you've successfully authenticated and made an API request, you can begin exploring the rest of Freightview's v2 API.
Depending on your integration, you can use the API to:
- Retrieve freight quotes
- Create shipments
- Edit shipments
- Cancel shipments
- Track shipments
- Work with LTL, parcel, and truckload functionality
- Connect Freightview with your ERP, e-commerce platform, or other business systems
For a complete list of available endpoints and request requirements, visit the Freightview Developer Documentation.
API Webhooks: Get Real-Time Updates
API requests aren't the only way to connect Freightview with your systems. Freightview Webhooks provide real-time updates.
For example, you can use webhooks to trigger downstream workflows when a shipment is:
- Booked
- Picked up
- Delivered
- Updated
Setting up Webhooks
To configure a webhook:
- Navigate to Settings > API Integration > Webhooks in Freightview.
- Enter a technical contact email so Freightview knows whom to contact in the case of technical issues with the webhook.
- Select +Add webhook.
- Enter the webhook URL (and webhook sandbox URL) where you want Freightview to send events.
- Select which types of events you want to receive. Select Save webhook.
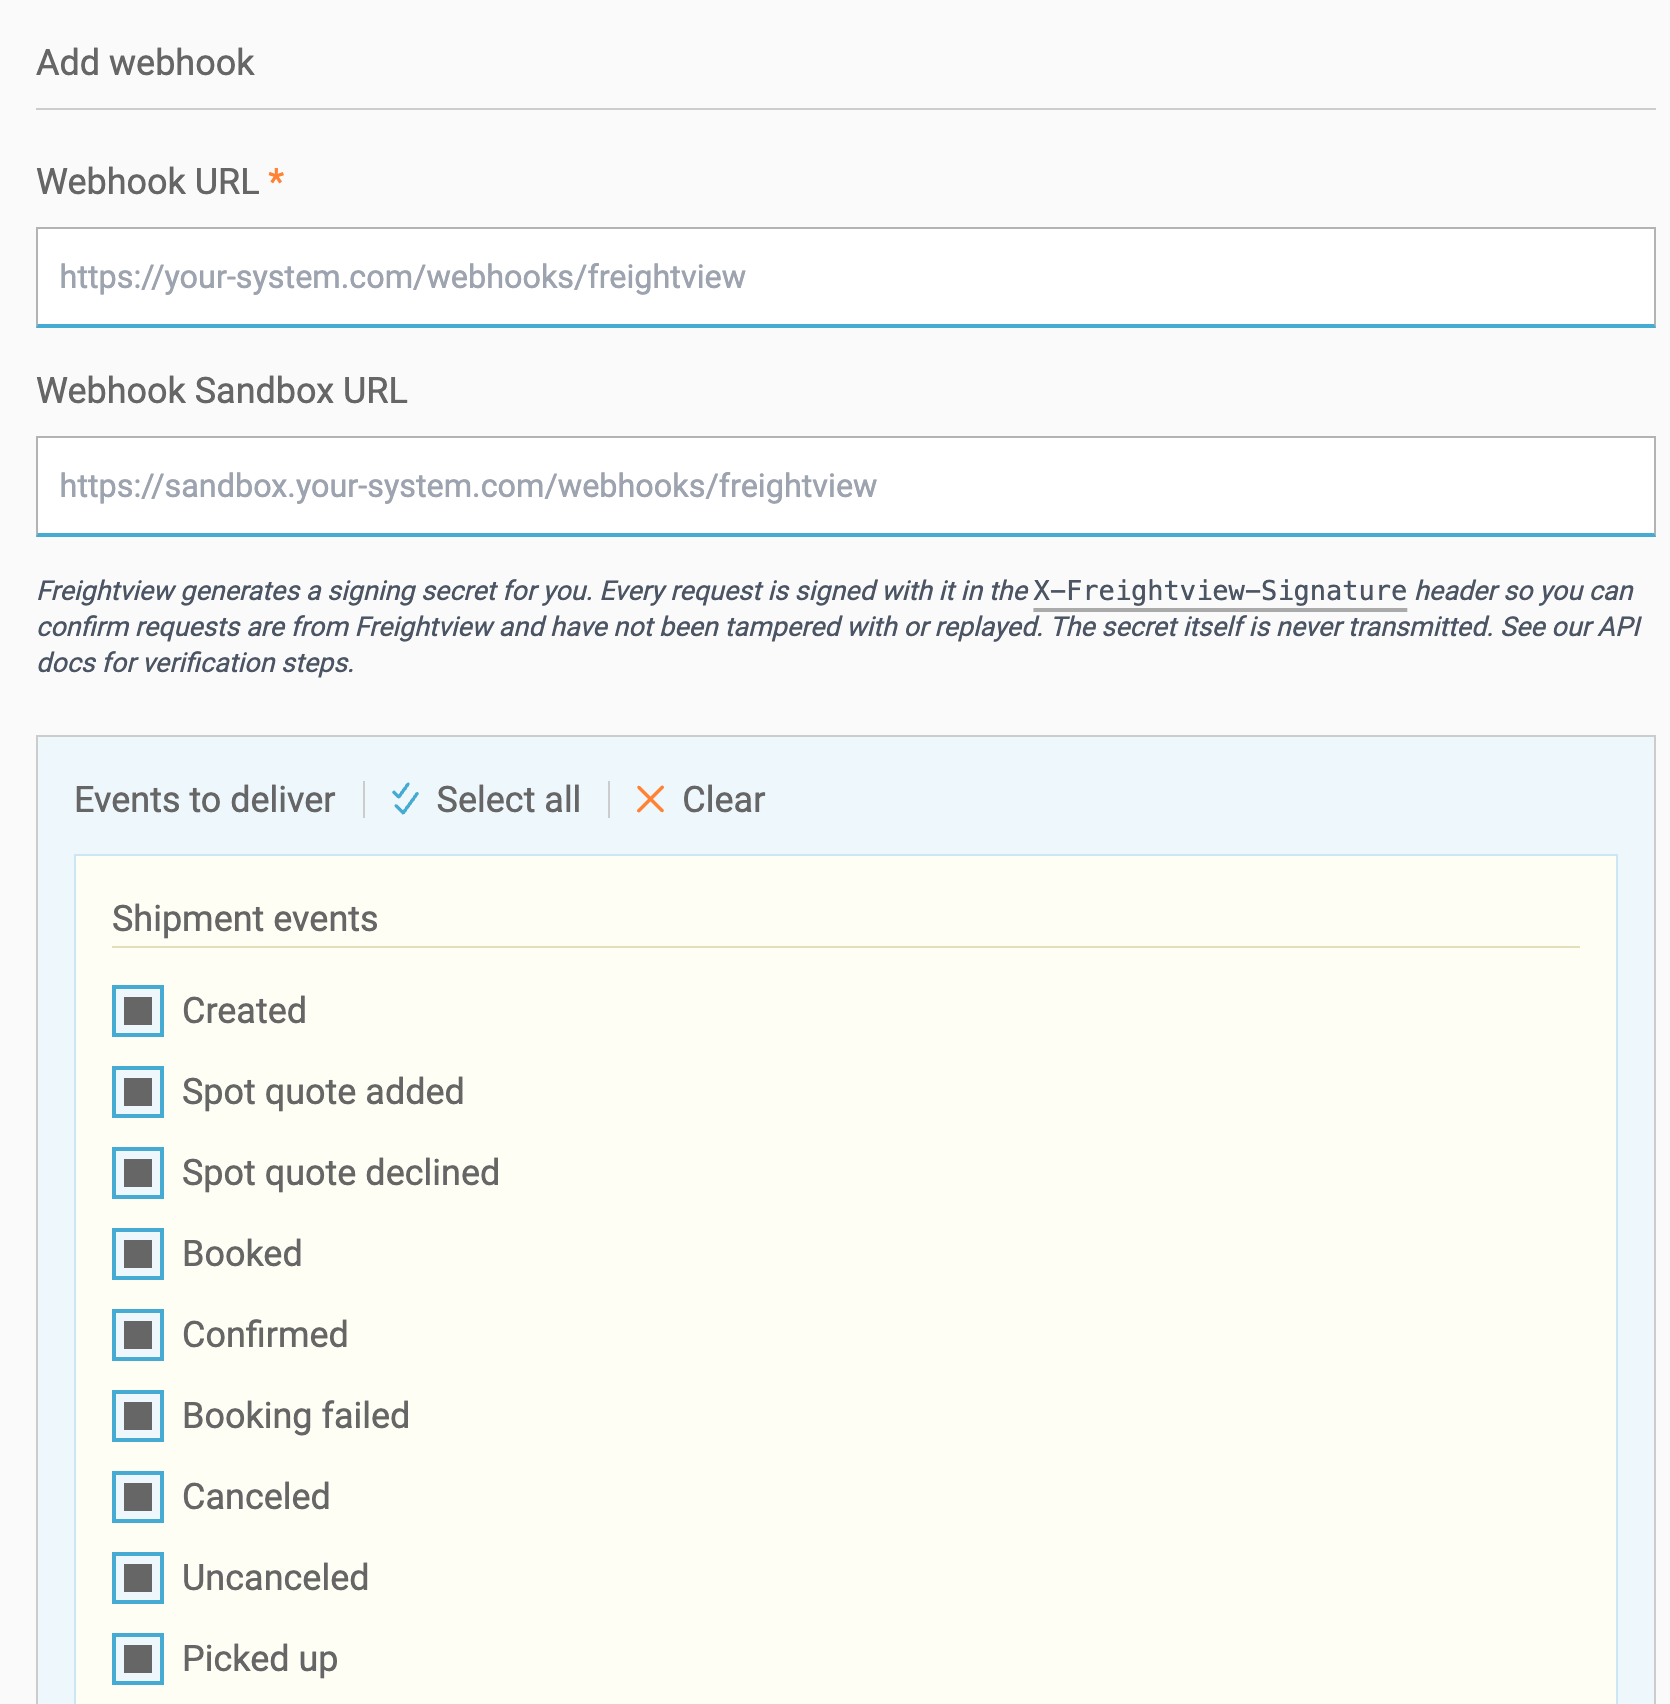
- Once the webhook has been saved, the webhook signing secret will be shown once. Store it securely, and use it to verify incoming Freightview webhook events using the details in our API webhook documentation.
- You can test the webhook connectivity by selecting the Test option next to each webhook URL. This will send the
webhook.testevent (as defined in the API webhook documentation) to that webhook URL.
Freightview signs each webhook payload using a unique signing secret. The signature is sent in the x-freightview-signature header, allowing your system to verify that the request originated from Freightview and hasn't been altered in transit.
For more information about available webhook events, payloads, and implementation details, visit the Freightview Developer Documentation.
Ready to Connect?
Whether you're building a custom integration or connecting Freightview to an existing business system, the Freightview API gives you the flexibility to bring freight quoting, shipping, and tracking directly into your workflow.
Have questions about getting started? Check out the Freightview Developer Documentation for technical details and API reference information.
Contact our Support Team for further questions & assistance.